Haida Gwaii 2022
Inside Passage,Prince Rupert, Haida Gwaii
|
|
|

|

|

|

|
|
|
Mile Zero Haida Gwaii Group
IMG_2022_2915-HaidaGwaiiGroup.jpg
|
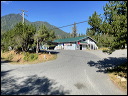
Victoria to Port Hardy - Stop at Woss
IMG_2022_2915.JPG
|
Victoria to Port Hardy - Stop at Woss
IMG_2022_2916.JPG
|
Victoria to Port Hardy - Stop at Woss
IMG_2022_2917.JPG
|
Victoria to Port Hardy - Stop at Woss
IMG_2022_2918.JPG
|
| |
|
|
|
|
|
|

|

|

|
|
|
Victoria to Port Hardy
IMG_2022_2923.JPG
|
Port Hardy - Kwa'lilas Hotel
IMG_2022_2925.JPG
|
Port Hardy - Kwa'lilas Hotel
IMG_2022_2926.JPG
|
Port Hardy - Kwa'lilas Hotel
IMG_2022_2927.JPG
|
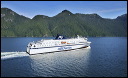
Port Hardy to Prince Rupert - Inside Passage
IMG_2022_2929-northern_expedition.jpg
|
| |
|
|
|
|
|

|

|

|

|
|
|
Port Hardy to Prince Rupert - Inside Passage
IMG_2022_2930.JPG
|
Port Hardy to Prince Rupert - Inside Passage
IMG_2022_2931.JPG
|
Port Hardy to Prince Rupert - Inside Passage
IMG_2022_2932.JPG
|
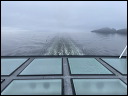
Port Hardy to Prince Rupert - Inside Passage Foggy Departure
IMG_2022_2934.JPG
|
Port Hardy to Prince Rupert - Inside Passage
IMG_2022_2936.JPG
|
| |
|
|
|
|
|
|
| Photo Catalog Created on: 18/9/22 3:26 PM
|